tiistai 21. kesäkuuta 2016

Yamaha 9.9 4-stroke (1991) outboard carb cleaning

I just recently bought a 1991 Yamaha 9.9 four stroke outboard. The motor is in good condition, but it had problems with running. The symptoms were that it would not run idle unless i covered intake duct almost fully with my hand.

For this you can figure out, that if you need to cover intake for motor to be able to run idle, it tells you something about fuel and mixture problems. The motor ran ok with higher rpm's but died on idle.

Covering the intake works like a manual choke and forces the carb to pull fuel. I came to a conclusion that the idle valve and passage must be clogged. The motor had been standing in warehouse for two years.

Again, i let the pictures speak:


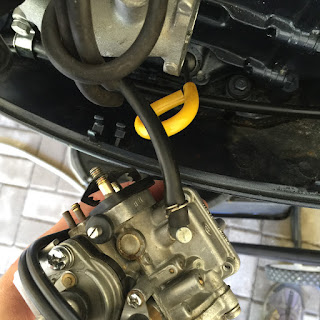
Remove the carburetor. It is attached with two M6 nuts. Pull the vacuum hoses off. Remove fuel hose.
Remove the float chamber by opening four screws.

Open the nozzle with flat screwdriver. This exposes the main jet.

Unscrew the retaining screw and the main jet slides out

Here you can see the main jet and nozzle


The main jet. Cleanse thoroughly with petrol and make sure the little holes are open.

Pull out the nylon plug from idle jet passage. It is held there by an o-ring.

The idle jet under the nylon plug. This was covered in fuel residues and caused my idling problems.

Clean the idle jet with petrol. I used a small dental floss brush.

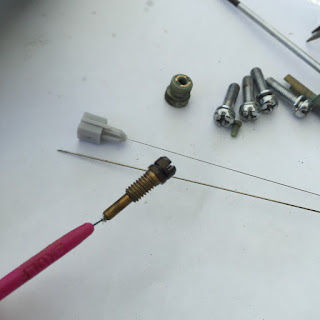
The jet hole was clogged. I opened it with thin needle. (inner needle of spinal tap needle)

I also used the needle to lean all other small passages.

Use air blower to clean all passages.

Remove the mixture valve.

Clean an inspect for any damage.


Screw the mixture valve back so that it seats gently (do not tighten hard to avoid damage). Back off about 1.5 rounds.

Assemble the parts back in reverse order. Remember to position the main jet in correct orientation (opening towards the intake manifold, secure with retaining screw). Install the carb back to intake manifold. Attach the throttle rod.

Attach the fuel line and vacuum tubes.

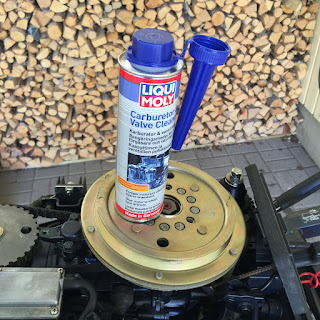
I also added carb cleaning agent in the fuel.

The motor ran idle straight away after the cleaning. Problem solved!


Skoda Superb rear hub change

Simple instructions how to make a DIY change of rear wheel hub. 

I noticed a slight noise coming from my right rear wheel while driving. I hoisted the car and tested rear wheels for any sideways movement. There was a noticeable play in right side. Contacted my local repair shop where they quoted 190€ plus some 120€ for parts. I decided to go and try it out myself. I found the hub for 63€ from online shop (www.pkwteile.de) plus 9,95€ shipping to Finland. It was an original SKF hub VKBA 3644.

The change is quite straightforward with right tools and can be done in under one hour. You will need to have your car lifted up, because it will be very difficult to achieve needed torques with car only jacked up from one side.

I'll have the pictures to talk for me.


Wheel taken off

You need to take the brake caliper off. First undo the double nuts with two wrenches to remove the pistons.

This is a good way to position the wrenches so that you can squeeze them open. Remove the brake pads.

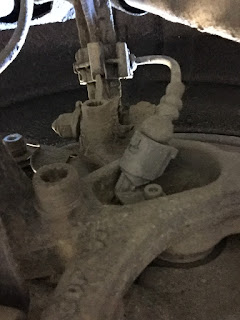
Next remove the brake caliper frame. It is fastened from the inside with torx-bolts.

Closeup of the caliper bolts and tool

I used fairly large torque wrench

Brake caliper removed

Next pop off the dust cover from the hub. Nevermind damaging it, as a new one is always included in hub set.


 Next remove the brake disc. It is fastened with one torx screw.


Once the dust cap is removed you can see the hub bolt. This is a pain in the a** to remove because of the torque. Opening requires a special XZN M18 head. I bought mine from local auto parts store for 15€. Do not try to use anything else. 


XZN M18 1/2" bit

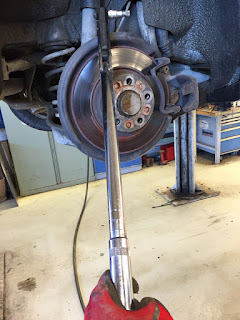
I used longest possible wrench to loosen the bolt. Still i had to hang from the wrench with all my weight. 

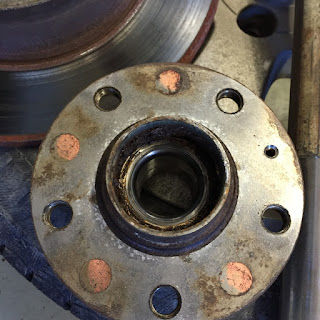
Once the hub bolt is removed, the hub slides easily off from rear axle.

Old hub

New hub

New hub (VKBA 3644)

Install the new hub on the axle and use supplied new bolt. The bolt needs to be torqued to 180 Nm plus 180 degrees. I managed to get it to around 120-140 degrees over the torque with long wrench, a pipe as an extender and LOT of force. The bolt is meant to stretch in place, thus the insane amount of torque.

Install the brake caliper back.

Install the brake saddle, the dust cap and you're done!